Earlier this week I was sitting with Shira while she
completed a fitness-related test at the gym. From my perspective,
there were two unique
features of the test: one, Shira was obviously not a happy camper
while doing it and two, she couldn't talk.
The test was just a few minutes long, so I immediately came up
with the idea of distracting her with YouTube clips. The only
problem: in the moment I'd forgotten every single TV show and movie
we'd ever watched. For the life of me, I couldn't think of a single
piece of media we'd enjoyed in the last 22 years of being
married.
Grasping for anything, I finally searched for the one show that
did come to mind: This Is Us. What came up were clips from a
recent episode where two of the main characters have an incredibly
intense and awkward scene. It was awful. If anything, it slowed time
down further.
My mind raced as I tried to think of literally any search that
would bring up a funny and familiar clip. Shira then held up her
hands to get my attention. I counted the fingers she held up:
eight. Eight she flashed again. And again. What did eight mean?
Finally I had a useful thought: I had a pen and notepad in my
pocket! Shira couldn't talk, but she could write. I pulled them out
and handed them to her. She wrote: 9 9.
Huh? Oh, 99, as in Brooklyn 99! That's a goofy show we
watch and enjoy. A quick search brought up a stream of cold opens
which we used to pass the time.
When the test was over, I confessed to Shira that I was amazed at
how much my brained had turned to mush. She agreed. Her proof: she
wasn't holding up eight fingers, she was holiding up nine. She was
flashing me nine-nine, the only TV show she could think to describe
with hand signals. You're telling me, in the moment, I'd lost the
ability to count? Yikes.
As I type this, I'm confident I could rattle off a dozen terms
that would bring up distracting content on YouTube. Heck, if I had
just added "funny" to my This is Us search I'd have found an
appropriate video.
Stress makes you dumb. I know this. I've read
about this. But to experience it first hand, man, is it
humbling. I feel like I was the one tested this last week, and it
did not go well.
Last week I was running across a bridge over Four Mile Run when I noticed a sticker. And then another. And then another. It so grabbed my attention that I ran back to the start of the bridge and captured this wobbly video:
Here's a few stills of the sticker:
I couldn't help but wonder, what was I looking at? Did this image mean something? Was it an ad? Was this done by a board high schooler?
I figured a tineye search would put the matter to bed quickly. But no, the image wasn't found anywhere on the web. I found a list of 40 common stickers in DC and it's not listed among them.
As I dug around for evidence of the sticker, I began to read up on sticker street art (aka sticker slaps, sticker tagging and sticker bombing) and came to appreciate that it's a respected art form. It's sort of like graffiti's faster, more nimble cousin. There's no doubt it's a clever hack for getting your message seen by the masses, and for those in the know, it's a chance to experience art in unexpected places. It's also vandalism and can mar public spaces. If I take the optimistic view and choose to look at the stickers on the bridge as art and not noise, I can begin to see meaning.
The image calls to mind Sherlock Holmes, the detective known for his next-level observational skills. Isn't it deliciously ironic then, that most of the users of the bridge will pass without noticing the dozens of likenesses of Mr. Holmes. What else do we pass by in life because we miss the clues?
And while it's possible (and probably likely) that my lofty explanation is giving this collection of stickers too much credit, I think it's worth noting that the stickers appear to be hand cut. To me, that implies someone put in a fair bit of effort into to placing these stickers. Mainly, this isn't merely the work of a 7 year old haphazardly emptying a book of stickers he found on the nearest convenient surface.
So that was supposed to be the end of the post. I saw an interesting sticker, got an appreciation for a new genre of art, and practiced my art appreciation skills. Last night on my run through DC, I figured I'd take some pics of the stickers I encountered to use in future posts. What I found blew my mind.
First, I saw almost no stickers. The blank canvas that is the back of most signs were pristine. I was running in a touristy part of DC, so perhaps this isn't surprising. But it wasn't a complete bust. As I ran over the 14th Street Bridge into DC I saw one particular sign that was stickered up:
Zooming in on one of the stickers I saw:
Whoa! The border of the sticker matches the Holmes one from above. Here are the two stickers overlaid:
That's got to be the same artist, right? And what are the odds that I'd run by another example of his or her work at just the right moment?
All this raises more questions. But one thing is for sure, the declaration the second sticker makes, Art Is Dead, is greatly exaggerated. Apparently it's alive and well, and being slapped on signs and bridges all over the area.
I've started experimenting with vacuum sealing infrequently used
gear I carry in my man-bag. For
example, vacuum sealing turns my first kit, which mainly consists of tape and medications, into a surprisingly slim and durable package:
By cutting a small notch in the sealed edge of the bag, I hoped to make the kit easy to open:
In the past, I've avoided vacuum sealing kits because I
was wary of how inconvenient it would be once the seal was broken.
This past weekend, I got to find out if my concerns were justified. We were coming back from a
remote'ish hike and Shira needed some migraine meds out of the kit. I was able to tear open the pouch and get to them with
ease. Score one for the pre-cut notch. But then I found myself with
a new issue.
After tearing open the package, I ended up with a shallow bag
filled with lots of fiddly bits. I had to be careful that they
didn't spill out.
The solution, which astute readers will notice from the photo above,
is that
I now include a Ziploc bag in the vacuum sealed kit. The idea: once
the kit has been torn open, I can put the contents in the
baggie. The Ziploc weighs nothing and disappears in the vacuum
sealed package. Yet, next time I deploy the kit, I'll be glad to know
it's there.
It looks like vacuum sealing infrequently used gear is a
definite win.
For those keeping track, this is an excellent example of the second P in my
3
P's of gear selection.
Just when I think I've hiked every trail in the DC area I discover a
new patch of green space. This past weekend we found ourselves
hiking a
4 mile loop in the blandly named Frederick Municipal
Forest. The trail, as name suggests, is located outside of Frederick, Maryland, about an hour away and it was positively delightful.
The hike starts and finishes with a tricky, yet not especially treacherous,
stream crossing. Finding your way across without getting wet feet
takes some effort, but is doable. From there, the trail gently
climbs until you hit a cozy pine forest, where the trail then
descends back to the starting point.
The trail promised a waterfall, and sure enough, as we nearly
finished the hike we came across said water feature. It was quite
picturesque and made for yet another fun stream crossing.
We did the hike with friends and their three year old, PF. We saw
one hiker and a couple of bikers along the way, but other than that,
we had the forest to ourselves.
While the hike and catching up with our friends was great, the real
highlight was watching PF navigate our adventure. He covered the
full range of human emotion, from excitement (yay, we're going hiking!), to fear (I want to go back home), to 3-year-old
stubbornness (I
don't want to walk, I don't want to go in the backpack, I want to
sit down in the middle of the trail), to pure joy (climbing on
rocks and logs), to utter exhaustion (sound asleep in the
backpack).
As we made our way up to the Pine Forest I informed our friends that
there was a geocache in the area. They'd never heard of geocaching,
so I got to give my best sales pitch why we should stop hiking and
search around for a hidden container of goodies. They were down the
with the idea. Most adorably, PF was totally on board with searching
for treasure. Once I told him that was our mission, he kept chatting
to me about how we were on our way to the treasure.
Thankfully, the cache
didn't disappoint. Not only could we arrange for PF to find it, but
it was filled with lots of goodies for him to pick from.
As hikes go, this one was a much needed and appreciated treat. Of
course, now PF is going to expect treasure every time he goes into
the woods, but that's his parents' problem now. You're welcome.
This past weekend we had a real treat: we met my parents, brother, sister-in-law and nephew at Gravelly Point to watch the
planes take off and land.
I always forget how overwhelming, and more likely, terrifying the
whole Gravelly Point experience is to little
ones. Out of the blue, a plane is roaring overhead and adults are
gesticulating like mad. Add to this a bright sunny day,
crowds of people, car noises from a busy highway and an
overzealous Uncle Ben and you've got an anxiety inducing
experience.
So rightfully, G was a little overwhelmed at first. As the planes
flew by, he gave a look of genuine concern for those flying above
us.
It's also true that kids are amazingly adaptable. In no time, we
were 'playing soccer,' waving at planes
overhead and having a great time. We even hit up the ice
cream truck for a tasty nosh (thanks Dad!).
We're not all vaccinated and we were in a public space, so
were still masked up. But in many respects, the day felt delightfully
normal. Man I miss normal.
Despite the look on my face, the Covid-19 vaccination process was without drama. After months of hearing about the vaccine, it's pretty sweet to have a dose in my arm. A huge thank you to everyone that made this possible, from the scientists who did the basic research, to the CVS employee who offered me water while I waited to see if I had a reaction, and everyone in-between.
This past weekend I was cleaning out our shed and made a bit of a
discovery. Behind some old paint cans was a Tupperware
container filled with emergency gear. I'd
apparently found a kit I'd stashed in our shed for some future
cataclysmic event. Let's critique it!
The container is of the 4 cup Ziploc variety and here's its
contents:
The Good
Let's start with the good. What do I like about this kit?
1. I have to admit this was at least a creative attempt. So creative
I forgot about it, but still, an attempt was made.
2. The container was an excellent choice. It's a good size and the
contents were in pristine condition despite the shed being a hot and
dusty place.
3. I was happy to see the kit consisted mainly of high-value
universal items. Regardless of the emergency, a mylar
blanket, drum-liner, Bic lighter, tap
knife, sharpie, safety-pins and handkerchief are always going to be
useful.
4. The candles were an especially good choice. They provide light
and heat without requiring batteries and pair well with the Bic. As
if to prove the point, the finger-lights were both dead, I assume
because the batteries had failed.
5. It's nice to see extra gear getting put use, rather than being
stashed away in a drawer.
The Bad
But it's not all sunshine and roses. Let's talk about the short-comings
of the kit.
1. It's missing some obvious items. Most notably, where's the key to
the house and cash? The most likely emergency I can imagine where
I'd have access to the shed but not my house is if I'm locked out.
In fairness, I do have a key stashed somewhere else on our
property for just this scenario. But still, how could I not have dropped
a few bucks into the kit? From a weight and volume perspective, it's
hard to beat the problem-solving impact of cash.
2. And speaking of missing items, there's at least two universal
items that are obviously missing: rope and duct-tape. I just
watched this emergency gear
preparedness video, much of which I could quibble with, but he
does have a solid point: a
100 yard spool of dental floss would be a cheap and easy way to
equip a kit like this with cordage.
3. I'm generally wary of the multi-kit approach to preparedness. In
theory, having a car kit, bike kit, hunting kit, travel kit, etc. let's you
optimize each for the constraints of the given scenario. In
practice, I've found that it's too easy to forget what's in the
kit. You end up, like I have, driving
around thinking you have jumper cables in your car kit and
don't. Or just as problematic, thinking you don't have jumper cables and
do.
My preference is to build out a small
universal kit, bring it more or less everywhere and augment
it as needed. Fore example, I always try to have a Bic
lighter, duct tape and heat sheet on me, and then in our car I've
added a battery-powered jump starter.
4. And my biggest critique: what problem was I actually trying to
solve here? I'm all for simple joy of kit building, but the first step
in the process is understanding what you're actually
preparing for. In this case, the kit cost me almost nothing in terms of
space, time and money, so there wasn't any real downside to it. And
caching items in alternative locations is a clever strategy to
experiment with. But to
make this a truly effective kit, I'd need to identify when I'd want
to deploy it, and practice using the kit in that capacity.
That's one of the primary issues with the gear video I
noted above. It's an interesting take on emergency gear, but
without specifics of how it's going to be used, there's
no real way to know if it hits the mark or not.
Now What?
I've mulled over what I'm going to do with the kit and here's where
I've landed: I've removed the cheapy items (like the knock-off Swiss
Army knife and non-functional finger lights), added some cash and
I've put the kit back in my shed.
Ultimately, it's doing no harm there and has got me thinking about what kind of
emergency would benefit from having gear stashed in our shed. And
most importantly, it's a sort of gift to my future self who will no doubt
be delightfully shocked when, in a few years, I rediscover it.
As a programmer, I'm all about embracing laziness. So when I found myself
week-after-week clumsily clicking through the yahrzeit section of
ShulCloud I knew I needed a better way. The shell script below is
that better way.
The What
Taking a step back, ShulCloud is the platform my synagogue uses to
help manage itself. One feature of ShulCloud is the
ability to track yahrzeit's, that is the date an individual has
passed away. We use this information to
help loved ones honor their deceased relatives on the anniversary of
their death.
As a gabbai in my shul, I use this information to let me know who
should be honored in the upcoming week.
The How
ShulCloud doesn't offer a developer's API (not that I blame
them, but a programmer can dream). So the strategy I'd have to use
is good 'ol fashion web page scraping. Every time I want to download
the list of yahrzeits I use curl to re-login into the site and invoke
the export URL. The ability to pass a cookie jar file to curl (via
-b $COOKIE_JAR and -c $COOKIE_JAR) means that cookies set during the
login process are carried forward when I attempt to download the
export.
I do a bit of date math to allow me to specify the time frame I want
to view in terms of an offset. For example, I can run the following:
  # this week's yahrzeits
  $ shulcloudassist -a yz
  ...

  # last week's yahrzeits
  $ shulcloudassist -a yz -w -1
  ...

  # two week's from now yahrzeits
  $ shulcloudassist -a yz -w 2
A couple other notes of interest: I had to do use gdate on Mac to get
access to GNU date. A case $(uname) in statement at the top
of the script lets me set the date command to use and should make
this script cross-platform. And finally, I used csvkit to
process the exported data.
Here's what this week's yahrzeit list looks like. Note that I'm running the output
through scrub_names.sh to replace real names with random
ones. The output tells me not just
who the mourner is and the anniversary date of their loved one, but also the date's offset relative to today. Below Berry Guss is remembering
Randall Royce, and I can see that the exact yahrzeit was 2
days ago.
$ shulcloudassist -a yz |  sh ./scrub_names.sh
Sat Apr 10 (-3d) Shannon & CorneliusAnn Portia, Rodger Hans: Ann Ezra
Sun Apr 11 (-2d) Berry Guss: Randall Royce
Mon Apr 12 (-1d) Teri Esmeralda, Lacy Willis: Margret Kathryne
Mon Apr 12 (-1d) Valorie Frank: Gregg Craig
Mon Apr 12 (-1d) Rodrigo Kattie: Madelyn Sol Gena
Tue Apr 13 (0d) Dixie Maud: Neal Toni
Wed Apr 14 (1d) grandmother of Alec Charlie: Norman William Dorian Ramon
Thu Apr 15 (2d) Christi Bryce: Jessie Sebastian
Even if you don't use ShulCloud, you may find this web
scraping and date mashing example helpful. Happy Hacking!
Here's the script I used to randomize names in an input stream. This script was intended as a throw-away, which is why it's not particularly elegant.
#!/bin/bash

##
## scrub names from input. Replace what appears to be a name
## with a random name from baby-names.csv.
##
## Grab baby-names.csv from
## https://github.com/hadley/data-baby-names/blob/master/baby-names.csv
##
sed 's/[A-Z][a-z][a-z][a-z][a-z]*/NAME/g' | tr '\n' '@' > /tmp/ping

while [ -n "$(grep NAME /tmp/ping)" ] ; do
  name=$(shuf -n 1 baby-names.csv | csvcut -c 2)
  sed "s/NAME/$name/" /tmp/ping > /tmp/pong
  mv /tmp/pong /tmp/ping
done

cat /tmp/ping | tr '@' '\n'
Earlier this week I found myself scrounging through drawers
looking for a tool to pry a plastic disk from the
glue pad it was cemented to. I found just the tool in my Columbia
Must-Have Multi-Tool. Between the heat from the
hairdryer and the leverage from the multi-tool, I had the project completed in
no time.
I also got to relish in the joy my Columbia Must-Have
Multi-Tool gives me.
Back in 2016
Shira and I visited Bogota, Columbia. While there we found
ourselves in the equivalent of $1.00 store, and while shopping I
spied a bin full of these beauties:
Did I need a poorly made combination hammer, pry-bar,
hatchet, nail puller? Uh, yeah. I did. Badly. The 10 year old
boy in me needed one, and the adult in me figured it would be a novel
souvenir.
Back from our travels, I hadn't found a use for the
multi-tool. One reason why: the hatchet blade was comically dull.
After my experience earlier this week using the pry-bar, I got to
thinking that sharpening the blade may be a worthwhile
undertaking. I'd end up with a more useful tool and perhaps learn
something along the way.
I followed the advice offered in Home Built Workshop's How to Sharpen an
Axe video. I ordered an $8.00
axe file off of Amazon, clamped the multi-tool to our kitchen
island, and cautiously started to scrape away at the blade.
It was like magic! With just a few strokes of the file I could
tell that I was removing metal, shaping the blade and generally
making things better. It's almost like the axe file is
designed for sharpening axes (spoiler alert: uh, yeah. What else
would it do?). I suppose I figured that the file required a skilled
operator; apparently not.
All told, I probably spent 30 minutes sharpening both sides of the
blade. I found the repetitive process oddly soothing. I'm the
farthest thing from an expert, but I'm almost
certain I could feel when the file was at the right angle and I was
making forward progress.
The blade is definitely not 'shaving sharp.' But it's vastly sharper
than when I started. As you can see from the carrot I sacrificed to
the cause, not only could I chop, but I could slice shavings, too. I do
believe I finally have a functional blade on this sucker.
Overall, I'm really pleased with this little project. I avoided
buying gimmicky or over-priced products to get the job done. Instead, I focused on
learning a new skill in a low-pressure way. I couldn't have
dulled the hatchet any further. About the worst I could done would
have been to ruin an $8.00 file. That's a risk I was glad to take.
Want your own Columbia Must-Have Multi-Tool? You can buy the same tool on
Amazon for $12.00. It's not the $1.00 or so I paid for mine in
Columbia, but of course, you won't have to buy plane tickets to
Bogata. So there's that.
The hatchet even comes with this notice: comes
dull for your own safety, sharpen it to your own preference. You
see, the dullness is a feature, not a bug! And I think they're on to
something: buying a cheap hatchet and file will give you a chance to
be amazed at what a little elbow grease can produce.
I captured the above photos by running by the same set of trees for 4 weeks. Here's four take-aways from this experiment.
1. Trees are Amazing
They take whatever abuse nature and humans throw at them during the
winter, and just when you think they can't possibly be alive, they
explode with growth. I know this is how trees work, but still, it's amazing.
2. Unix is Great
I had dozens of the photos of the above scene, yet I needed to pick the
best four photos to work with. After downloading a zip file of all
images, I ran the following Unix commands to organize them:
# Make a directory for each day and store all the day's photos
# in it
$ for f in *.jpg; do d=$(identify -verbose $f  | \
                         grep exif:DateTime: | \
                         awk '{print $2}' | \
                         sed 's/:/-/g'); \
    mkdir -p $d ;  \
    mv -v $f $d; \
done
renamed '20210311_165836.jpg' -> '2021:03:11/20210311_165836.jpg'
renamed '20210311_165840.jpg' -> '2021:03:11/20210311_165840.jpg'
renamed '20210311_165842.jpg' -> '2021:03:11/20210311_165842.jpg'
renamed '20210316_165538.jpg' -> '2021:03:16/20210316_165538.jpg'
...

# Launch the feh image viewer to preview each
# directory's images at once
for d in *; do (cd $d ; feh --auto-rotate -i  -E 300 -y 300  *.jpg &) ; done
Using feh I was able to
get a visual overview and then pick the four best matching photos.
3. Art is Hard
In my mind's eye, this project was going to result in a
composite image that displayed the breathtaking transition from
lifeless landscape to Cherry Blossom Greatness that the DC area is
known for.
Needless to say, I missed that mark:
You can see the transition in
the above photos, but there's nothing jaw dropping about it. My
attempt to capture the scene precisely the same way every week was a bust, and
many of the trees around where I took these photos were bursting
with flowers while the trees I focused on where relatively bare.
Ultimately, I got out of this project what I put it into. I grabbed
photos while out on my run, and the results look like this.
All this makes me appreciate a well crafted art project,
the likes of which takes notable time and attention. And
if you do it right, folks will almost certainly think I
could have done that.
4.The App I Needed
To do this project right, at a minimum I'd need more
care in picking my location, more time to allow shooting
multiple locations, and the use of instruments (measuring
tape, compass and tripod) to confirm consistent camera placement.
However, I could have shortcut this a bit if I had a camera app that
supported Onion
Skinning. That is, the ability to show a partially-transparent imagine in
the camera preview. This allows lining up a shot using a
guide-photo.
A quick search on Google Play returned a couple of options for a
camera app like this, though none of them looked like a fit for
me. Ionic, my app building framework of choice, has a Camera
Preview plugin. An interesting test would be to place a
partially transparent image over the Image Preview component. If that works,
then I could make my own 'Onion Skinning Camera App' with relative
ease.
Every once in a while Shira will be reading a book she thinks
we might both enjoy, and she'll opt to read it aloud. I enjoy audio
books, so I find this quite the treat. It turns reading into a
shared activity, like binging a TV series. Unlike TV, we can do
this while multi-tasking.
So for the last few weeks, while I loaded and unloaded the dishwasher or
was cleaning the kitchen for Passover, Shira narrated David Baldacci's A
Minute to Midnight.
In A Minute to Midnight I got to meet Atlee Pine, the hero of
the book. I like her. Mostly. She's thoughtful and confident,
without being insufferable and cocky. I can't tell if her weight
lifting past adds detail to her character, or puts her over the
top.
The pace of the book felt slow, but if I'm kind, I can chalk
that up to Baldacci trying to keep things realistic. She encounters
a series of puzzling murders, and I can appreciate that it takes
time to put all the pieces together.
One aspect of the book I found surprisingly enjoyable was how
Baldacci had a number of plot details that initially seemed like author
goofs, but upon further reflection made sense.
Take Pine's childhood. Are we to believe that a trained FBI agent
wouldn't spot the massive inconsistencies in her own parent's
behavior? She can tell when a stranger is lying to her, but doesn't
recognize the suspicious behavior in her own parents?
Actually, I buy that. For must of us, whatever our childhood was, was
by definition normal. We can't imagine our parents as inexperienced
human beings with their own baggage because to us they are Mom and
Dad, not real people.
Or consider the presence of the Pagani. Are
we to believe that a baddy would opt to be seen in a 20 million
dollar car in a resident neighborhood? That's ridiculous. But when
we consider the role of the car was to attract attention and that
the person who selected the car didn't know the details of what they
were picking, the choice seems plausible. Who would have thought the
flashiest car in the garage would turn out to be absurdly unique?
One quirk of the book I haven't decoded: its title. I missed the
first chapter (Shira started reading the book to herself before she
made it an audio book), so maybe the answer was in there. But
honestly, I have no idea what the title is referring to. I guess
I'll have to hit Google to find out.
Should you drop everything and read A Minute To Midnight?
Sadly, no. It's a fine read if you like a good
o'l murder mystery, but there wasn't anything here to make it
stand out for me. The story was generally slow and snapped into
place at the last moment in typical fashion.
Still, as a shared reading experience, it was a positive one. And we will
definitely be back for the next book in the series.
First, what a world we live in! You're telling me that I can order 48 packets of tuna on
Sunday night at 8pm, and they're delivered to my front door by 9am the
next day? In time for second breakfast, no less! And, all this
convenience for a price that's cheaper than buying at the supermarket?
Amazing.
And second, while we've never had an issue with our packages being
stolen, and I'd never condone the practice, I can say that an itty-bitty-teensy-weensy
part of me wishes that a porch pirate had nicked this one. They'd
pick it up and think, hmmm, this has some heft to
it I bet it's pricey electronics.
And when they opened the goods they'd be shocked to
find they just stole some freak's tuna stash. Oh the very
thought of the hypothetical look on their face makes me smile.
Shira's new LG
V60 ThinQ is a sweet phone. The jury is out on whether
the dual screen is genius or gimmick, but I applaud LG for the
attempt. As someone who regularly busts
out a bluetooth keyboard to program directly on my phone, all
that screen real estate is a dream.
The Challenge
One feature that Shira misses with her new phone is the LG
Floating Bar. This
compact menu bar could be expanded to quickly access apps or
contacts. For a while, there was a recipe for running an old version of
the Floating Bar on the V60, but recently that
stopped working.
Knowing her husband has mad next level programming skills (my words, not
hers), she asked if I could help build her an alternative app. A
quick Tasker search encouraged me that I could.
So this was possible. It took me a couple of attempts, however,
to figure out how to build and customize my own floating bar. I'd like to
save you the trouble of figuring this out yourself, so here's a
quick tutorial to get you started. Enjoy!
Step 1: Install The Tools
To make your own bar you'll need Tasker, AutoApps
and AutoTools. These
apps are worth paying for, so do so if you can.
Step 2: Install the Demo Floating Bar
Fire up tasker and make a new Task called FloatingBar
Launcher. Add a single action: Plugins » AutoTools
» Web Screen. Configure the action, selecting 'Screen Preset'
and choosing 'Floating Bar.' Click the check-mark to save your work.
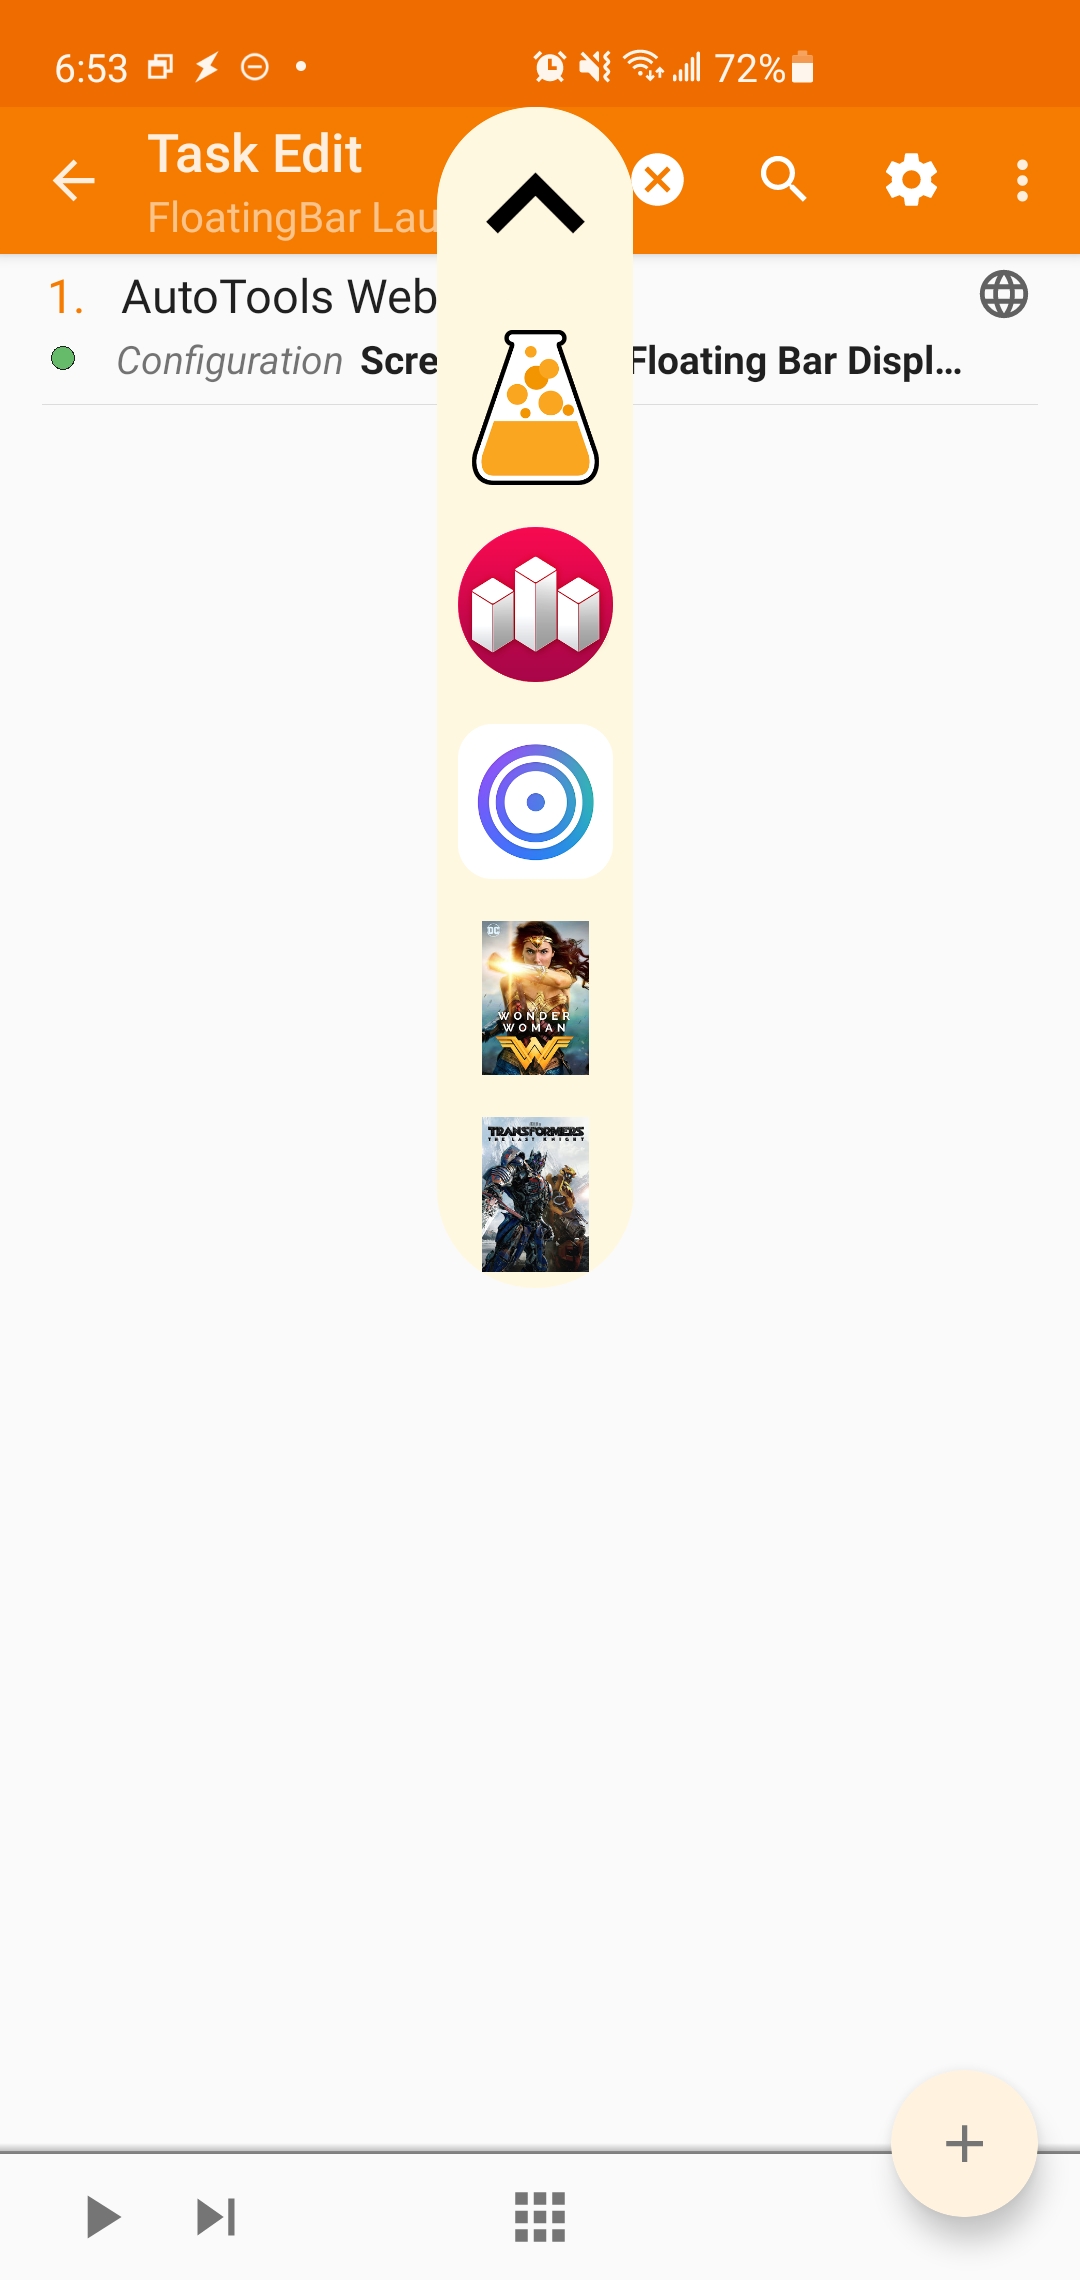
If all goes well, you'll find yourself back at the task
definition. Run the task and you should see a floating bar appear at
the top of the screen. Awesome, right?
Step 3: Try, Fail and Fix the Gravity Setting
Let's say you want the Floating Bar to appear on the right hand side
of the screen versus the top. It's easy enough to edit the action
you created, going to Window Settings » Gravity » Right.
Save your work and re-run the Task. If all goes as expected, then you'll notice nothing happened. You changed the gravity, but the toolbar still shows itself at the top of the screen. What gives?
What seems to be going on is that the first time you ran the task you launched your floating bar. The floating bar is still running, so when you executed the task again, no new floating bar was created. My fix, therefore, is to insert a new action into the task that closes the floating bar. This forces every execution of FloatingBar Launcher to create a fresh floating bar and use whatever settings have been selected.
Create a new action: Plugin » AutoTools » Web Screen. Configure the action and select Display Mode » Close. Yes, to close a web screen you have to make a new web screen. Just go with it. Make sure this closing action is first in the list of actions to execute and then try running the Task. If all goes well, you'll have a floating bar that respects your choice of right-side positioning.
Obviously, you'll need to use this close action with care. As it's setup above, it closes all web screens. Ultimately, you'll want to tweak it so that it just closes the one floating bar you're creating, otherwise this will mess with your other Web Screen creations; probably not what you want.
Step 4: Make It Your Own
You've now got a floating bar that you can control. The next mystery is how to replace the stock icons with your own. Turns out, that's easy. Edit the Configuration of the Floating Bar Web Screen and go to Items. Here you'll configure key aspects of your floating bar. Start by selecting the icons you want to include. AutoTools will help you out by letting you graphically select them.
Next, click on the 'Commands' field. This brings up a text box that you need to fill in with care. You want to enter a comma separated list of words here, where each word will correspond to the icon you selected. Given the icons I've chosen, I entered the following:
Lamp,House,Clock,Calc
It's important that there are no spaces after the commas and that capitalization is consistent. Finally, I filled in the Command Prefix with FloatingBar
When I re-run the FloatingBar Launcher Task I now see a floating bar with my selected icons on it. When I click the icons I see a message showing me the word I put in the Command list prefixed by the Command Prefix. Sweet, right?
Step 5: Make It Work
We've customized our toolbar so that it shows the icons we want and generates the commands we want. Now how do we respond to those commands? Easy. Make a new Profile: Event » Plugin » AutoApps. Notice here we selected 'AutoApps' when creating the profile, not AutoTools. This wasn't obvious to me, but this is what you're after.
Configure the plugin by entering a command that your floating bar generates, for example: FloatingBar=:=Calc.
I'm going to continue with the theme of building out 'FloatingBar=:=Calc', so I created a new Task named 'FloatingBar Calc'. That task has a single Action: App » Launch App » RPN Calc.
With that profile enabled, when I click on the calculator icon in the toolbar the RPN Calc app is launched. The floating bar works!
Step 6: Make it Awesome
At this point, you should have a functional floating bar. You need to make corresponding actions for every command, and you'll want to tweak the floating bar so it looks good. Take time to browse through the AutoTools Web Screens options and customize away.