No idea what type of mushrooms they are, but they sure are photogenic.


Any idea what I'm looking at?
No idea what type of mushrooms they are, but they sure are photogenic.
Any idea what I'm looking at?
I suppose the title should have clued me in: Jennifer DuBois' A Partial History of Lost Causes is a sad book. I mean, so sad that I occasionally had to turn it off and take a break from it just because it was so, well, hopeless. While the theme of lost causes are spread throughout the book, the two primary threads are Aleksandr's wrestling with a corrupt Soviet Union and Irina's wrestling with a dire medical diagnosis. And if it's gloom DuBois is after, she nails it big time.
Aleksandr's life takes place during the Russia of the 70's until today; basically the Russia I grew up with. While I'd appreciated that Russians didn't have the same freedoms I had, I never had the sense of just how 1984 life was there. The secret police, dire living conditions, the arrests and assassinations; I felt like this belonged in a dystopian novel, not recent historical fiction. And if you can read past the mud and the muck that Aleksandr lived through, there's the whole question of how you influence a system that's so stacked against change.
And then there's Irina's story. Hers makes Aleksandr's seem downright cheery. She's coping with a diagnosis of Huntington's disease, which is passed genetically. So not only do we see Irina face down her mortality, but she gets a front row seat in watching her own father die of the disease she's been slated to suffer.
OK, it's sad. But now what? I suppose DuBois could have waived her magic author's wand and given Aleksandr or Irina divine intervention. But luckily for us, she doesn't take the easy way out. No, we get the opportunity to see these lost causes play out as and we see first hand what you can do when you have no good options. It's intriguing and reminds us that ultimately, we are all lost causes. Nobody gets out of this world alive.
It's definitely a dense book and one I wouldn't want to re-read anytime soon, but I'm glad I took the ride.
Two other aspects of the book caught my attention. First, the audio book version (the way I "read" the book) is done quite well. The chapters are told in first person by Irina and Aleksandr, and the audio book follows suite by having two different narrators. They complement each other well and ultimately make the book more entertaining.
And second, this book was categorized in the library as historic fiction. Which it is. However, it's the first piece of historic fiction I've read that takes place during my lifetime. Aleksandr is quite obviously based on the chess champion Garry Kasparov, both of which are beaten by a computer and get involved in anti-Putin politics. The Russian Apartment Bombings are featured as well, matching down to the story of explosives marked as sugar. Naturally, there's plenty of fiction, too. It was a little disorienting reading about such vivid accounts, yet not having them match up to the reality of the events. Ultimately, the historic part of A Partial History is secondary to the key theme of living your best life. And for that, the fiction doesn't get in the way.
Read it, but don't say I didn't warn you.
Oh the joy of candy tins. First you get the candy, then you get to fill it back up as a covert pocket kit. Whether it's for urban survival (read: waiting at the Doctor's office), learning math, fiddling with electronics or being prepared at a wedding, a candy tin makes the perfect container for the job.
So you can imagine as I was noshing on Ginger Delights, that I was thinking how I was going to reuse the little tin they come in. For months, the tin sat empty and it was only in the last few days that I was moved to fill it.
So here it is, the Ginger Delights Survival Kit. First, the outside:

That's placed next to an Altoids tin, and on top of a 3x5" notebook to get a sense of the size of this guy. It's pretty dang compact. This makes it more pocketable than an Altoids Tin, but also more of a challenge to fill with goodies. It's worth noting that the Delights container seems to have a tighter seal than a typical Altoids Tin. With the Altoids Tin, I usually wrapped something around the outside to keep it securely closed. That doesn't seem necessary with a Delights container.
And here's what's inside:

The small CVS pill bag keeps the smaller items from rolling around and makes extracting them from the tin easier.
One has to ask, how useful is this kit? You could measure it against the 10 essentials (this kit scores 2 out 10), the 10 C's (this kit scores 5 out 10, not bad) or the rule of 3's (this kit helps with 1 of the 4 scenarios). You could also grab the kit and head out for a night in the woods, though if you're dressed properly, you really don't need any gear to survive such an adventure.
I think a more appropriate way to gauge these kits is to look at how the items fall on a scale from tried it, know it works to the Internet says so. The more items you have in the been there, done that side, the more likely the kit will be of value. I think the above kit does well in this department: the Bic Lighter, cordage and Duct Tape are all quite proven. The P-51 and scalpel are more specialty items, but still, I've used them in the past to great effect. And items like the hooks and tampon are definitely on the other extreme. Given the ratio of items that are proven, I think this kit serves its purpose well.
This begs one final question: what's the purpose of the kit? While it has a slight bend towards outdoorsy survival, it's definitely not limited to the woods. In fact, you're more likely to need to light birthday candles with the lighter than you are to need to start an emergency fire. In this respect, I think the kit also scores well in the versatility department.
1 I suppose the ideal test would be to I'm not really sure. One way to do so is to rate each item on a continuum from "I've got first hand experience finding this item useful" to "yeah, I read it on the Internet" type of useful." On this scale, the Bic Lighter, duct tape and cordage all live at the "been there, done it" end of the spectrum, while the tampon lives mainly at the Internet lore side of things.The garden has been hard at work teaching me lessons. Let's see, on conventional side, here's how things are looking:


In the latest setup, we've got chicken wire poultry mesh in place, drip hoses laid down and the garden partially covered in mulch. Why only partially? It's not some attempt at A/B Testing, no, we simply didn't have enough spare mulch to cover the entire garden. (Looks like another Home Depot trip is in our future - argh). The drip hoses turn out to be a no-brainer to use. The weather hasn't been terribly hot, and the soil is doing a fine job of keeping the moisture in place, so we've only needed to run the hoses a few times. But doing so is far less annoying than configuring sprinklers.
If you look closely at how the chicken wire is being secured, you'll notice cable clips are doing the job. I saw pretty obvious evidence that something was rooting around in the garden, and I needed to plug the holes using whatever I had on hand.

Our tomato plants are growing well, so well that we've kind of sort of staked a few of them out. I assume we'll to get fancier as they continue to grow out. What a good problem to have.
On the X-Garden side of things, I've throw a few more seeds in containers to see if anything shakes out. Inspired by this article and this article, I went ahead and planted a few tea related seeds:

The green and yellow sticks represent rows of Camellia sinensis which is actually tea. The purple stick is a Lavender, and the blue is Blue Flax. This last one isn't tea related but was a freebie from the person sold me the lavender. At least one web article suggested soaking the tea seeds in water for 24+ hours, which I did for plants in green row. The plants in the yellow row are just tea seeds dropped in the ground.
This whole colored stick thing is me trying to be more organized. One challenge I'm learning from the larger X-Garden: because stuff is basically randomly planted, it's not possible to tell which sprouts are valuable plants and which are weeds that were blown in and seeded. Next year, I'm so color coding this bad boy.
The mint we planted (also part of the tea motif) is doing well enough:

And I'm especially excited about this Red Leaf Amaranth:

For weeks absolutely nothing grew in the planter, and slowly but surely, these plants have been coming to life.
One of Shira's best dollar store purchases is this guy right here:

That's a magic wand made of a glow stick and plastic medallion that slides on to the end. Kids love them, and they're handy during a power outage or other emergency. (And at $1.00, how can you go wrong?!)
A few weeks ago I came across this article on EDC Forums: Wonky cheeser' everlasting glow stick. The article talks about replacing the goop in a glow stick with Glow in the Dark Powder. The result is a glow stick you can recharge and use as often as you want. I had a spent magic wand from the dollar store to try this with, so I went for it.
I picked up the powder from eBay: Green Glow-in-the-Dark Powder Pigment Strontium Aluminate for Sticks/Stars/Paint. Not knowing how much I'd need I picked up 50 grams worth. A week later I had a small bag of the magic powder in my hands.
I clipped both ends off the glow stick and carefully discarded the gunk inside. I then washed and let the plastic tube dry. My plan was to Gorilla Glue one end cap back in place, fill the stick with powder and re-glue the other end cap. Except, Gorilla Glue didn't do the trick. After letting the attached cap set for 24+ hours, it trivially snapped off when I tugged on it. Apparently the type of plastic used in this tube resists Gorilla Glue. I tried some 5 minute epoxy and ended up with the same result. I got the point: standard glue wasn't going to bond to this type of plastic.
I put the project down.
And then it hit me: why was I bothering to re-glue on the ends of the glow stick in the first place? I just needed to properly plug the ends. Gorilla Glue has the property of expanding as it dries, so I figured it would make an ideal cork. So that's what I tried: I carefully filled the bottom of the glow stick with some Gorilla Glue, stood it up on its end, and let it stand for 24 hours. The result: a securely plugged end. Because the leakage didn't bond to the plastic, it was easy clean up any extraneous glue.
Here's the setup as I prepared to fill the tube with glow in the dark powder:

(Note the end caps of the glow stick in the above photos, they're just there to serve as my extra pieces for the project.
And when I was done filling the tube I had the vast majority of my 50 grams of glow in the dark powder left:

I filled the second end of the glow stick with Gorilla Glue and let it dry. The result was in fact an everlasting glow stick! It takes a few minutes in bright sunshine and the results are pretty impressive:

Before you discard all your lighting for glow in the dark powered magic wands, note that there's an obvious Catch 22 here: the wand needs bright light to charge, but when you'd want to use it, it's probably dark out already. So I'm not sure how practical this is. But it's cool, and certainly perfect as a magic wand.
Oh I can't resist little mini adventure documentaries like this one: The Road From Karakol. It's beautifully shot, well narrated and makes you just want to hop on your bike and go have an adventure.
Enjoy!
The Road From Karakol from Outdoor Research on Vimeo.
Miva Merchant has core support for custom fields on both products and categories. In their latest documentation, they provide a clean API for accessing these fields. Recently I wanted to do something similar, but I needed to do so via MivaScript and my snippet framework. It took a bit of fiddling, but in the end it wasn't especially difficult.
First, I defined a series of helper functions that call the low level Miva related custom field functions:
<MvComment>
  lib.mv -- Work with custom fields
</MvComment>

<MvFUNCTION NAME="product_custom_field" PARAMETERS="field_name" STANDARDOUTPUTLEVEL="html, text">
  <MvASSIGN NAME="l.null" VALUE="{ [ cf_mod_path() ].Read_Product_Code(l.module, l.param, g.product_code, l.field_name, l.result) }"/>
  <MvFUNCTIONRETURN VALUE="{ l.result }"/>
</MvFUNCTION>

<MvFUNCTION NAME="category_custom_field" PARAMETERS="field_name" STANDARDOUTPUTLEVEL="">
  <MvASSIGN NAME="l.null" VALUE="{ [ cf_mod_path() ].Read_Category_Code(l.module, l.param, g.category_code, l.field_name, l.result) }"/>
  <MvFUNCTIONRETURN VALUE="{ l.result }"/>
</MvFUNCTION>

<MvFUNCTION NAME="cf_mod_path" STANDARDOUTPUTLEVEL="">
  <MvFUNCTIONRETURN VALUE="/mm5/5.00/modules/util/customfld.mvc"/>
</MvFUNCTION>
Note above that I'm leveraging g.product_code and g.category_code. These allow me to call product_custom_field and category_custom_field and have it assume I want the field from the currently active product or category.
Also note the use of l.null above. That turned out to be an interesting hiccup to overcome: I needed to call functions like Read_Product_Code and access their return value via a parameter. I originally thought MvEVAL was the way go, but ultimately I realized that calling MvASSIGN and discarding the assigned variable was in fact the proper approach. Using MvEVAL generated output to the page I didn't want.
Once I had these functions defined, I could import them and use them from any of my snippets. For example, here's code that checks for a custom field: seonoindex and if it's set, sets the ROBOTS meta tag appropriately:
<MvINCLUDE FILE='lib/lib.mv'>

<MvFUNCTION NAME = "ADS_External_File" PARAMETERS = "module var, item, all_settings var, settings var, ignored" STANDARDOUTPUTLEVEL = "text, html, compresswhitespace">

  <MvASSIGN NAME="l.follow" VALUE="FOLLOW"/>
  <MvASSIGN NAME="l.index"  VALUE="INDEX"/>
  <MvASSIGN NAME="l.cause"  VALUE="default"/>

  <MvIF EXPR="{ product_custom_field('seonoindex') NE '' }">
    <MvASSIGN NAME="l.index"  VALUE="NOINDEX"/>
    <MvASSIGN NAME="l.cause"  VALUE="prod-seonoindex"/>
  </MvIF>

  <MvIF EXPR="{ category_custom_field('seonoindex') NE '' }">
    <MvASSIGN NAME="l.index"  VALUE="NOINDEX"/>
    <MvASSIGN NAME="l.cause"  VALUE="cat-seonoindex"/>
  </MvIF>

  <MvEVAL EXPR="{'<meta ' $ A('name', 'ROBOTS') $ ' ' $ A('content', l.index $ ',' $ l.follow) $ ' ' $ A('cause', l.cause) $ '/>' }"/>
</MvFUNCTION>
The above code is convenient because it operates at both the product and category level. Meaning, you can mark a whole group of products NOINDEX by simply checking off the relevant custom field at the category level.
Given that the Pentagon is located in Arlington, and the rest of the government is just a stone's throw a way in DC, you can imagine we get a heck of a lot of helicopter traffic. But one day I look up and see an especially odd aircraft. It looked roughly like a plane, but it appeared to have its prop engines titled up like a helicopter.
I won't lie, the first thing I thought of was the G.I. Joe Rattler, which as any child of the 80's can tell you was a vertical take off and landing based aircraft. Note the pivoted engines:

Over time I came to appreciate that I had not seen some top secret government project, but a V22 Osprey. In fact, plenty of folks in the area had seen one (or it?). Shira told me tales of watching one run test flights throughout the day.
I'd continue to catch a glimpse of this cool aircraft, but I'd never catch sight of one long enough to snap a photo.
Today I finally did. It was way off in the distance, so pardon the grainy photograph:

On the other hand, a grainy photograph does seem appropriate for a UFO, no? (Even if it's only Unidentified to me).
Below is a photo of the the V22 at work. Man, that's one slick aircraft. Not as awesome as the Rattler, but still, pretty dang cool. I suppose it has the nice benefit of being real.
Last night, Shira comes home and tells me her battery warning light is on in her Acura TL. She's called the local auto parts store and they've confirmed that they can check and order the battery if necessary. Let's see how my Man Points do on this adventure...
-5 Points for not having the ability to check my own battery level.
+0 Points for figuring out a way to have Shira call the store, and not me.
+5 Points for knowing how to pop my own hood and find the latch to open it up.
-5 Points for being proud of myself for not fumbling the opening of the hood.
-20 Points for having no idea how to access the battery terminals on my own car. Stupid Acura TL and its Man Point sucking plastic shell found around the engine.
-5 Points for checking the manual.

+5 Points for *not* checking the web and just blinding starting to tug on stuff.
+10 Points for using my P51 can opener on my key-chain to pry open plastic snaps that held down the plastic.

+0 Points for strolling back into the store like a Boss explaining that I'd indeed found access to my own battery terminals.
+0 Points for being able to put the plastic shell back in place.
+0 Points for having no extra parts from this project.
Total Score: -15 Man Points
That's actually not bad. Thank heavens the clerk at the store didn't attempt any sports related small talk, or I'd be looking at a triple digit negative score.
Man, did Roman Mars nail it in his Ted talk: Why city flags may be the worst-designed thing you've never noticed. He manages to teach fundamental principles of design and inspire us to care about City Flags, all through humor and well delivered radio effects. It's a must watch.
To recap, here are the 5 principles of good flag design:
And how does the Virginia and Arlington flags stack up? Let's here's the Virginia state flag:

Yikes, pretty awful.
The Virginia one is: (a) too complicated, (b) contains text and (c) has too many colors. On the plus side, it's distinctive alright. For example, it contains the only nudity on any state flag or seal and has the joke: "'Sic semper tyrannis' actually means 'Get your foot off my neck.' which has been repeated since the Civil War.
And the Arlington one?

Oy. Too much writing and too much detail. Not loving the yellow, but I could probably be persuaded to keep it.
As Roman Mars mentioned, DC's flag is actually quite solid:

And now that he mentions it, I have seen that flag all over DC and I could definitely see feeling a jolt of civil pride from it. It works equally well flying high on a flag pole, or pasted as a sticker on someone's bike.
No surprise, some folks have attempted redesigns of especially bad flags. I'd love to see a take on Virginia's and Arlington's flag. Especially Arlington, c'mon folks, we can do better than this.
The TED talk is below, watch it and be amazed how much you care about this stuff:
MeZillch is at it again, publishing cool gear hacks on his YouTube channel. His latest set of videos: clever ways to carry around duct tape. I mean really, can you ever have enough duct tape? He's now up to 7 videos on the topic! Man, that's impressive.
The latest video he produced, EDC/ Survival Duct Tape pt. 7: Squash Packs & Clamps, provides a clever method for securing Altoid Tins with a "clamp" of duct tape. With his hack you get an Altoids Tin that stays shut when it should, but is easy to access when you need the contents. And of course, you get a supply of duct tape as a nice bonus.
Here's what my Altoids Tin looked like before and after this hack:


It's hard to appreciate from that photo, but that's just about 100 inches of duct tape, and it doesn't increase the size of the tin in a noticeable way.
By the way, the original idea of using a silicone bracelet to secure the tin was also an MeZillch idea.
Here's your Boy Scout homework for today: ask yourself, do you have duct tape handy? Check out the videos below and see there's no excuse for not carrying some.
OK, now we're talking! The raised beds that looked great, but were empty are now filled with plants:


In the end, Dawn and Shira settled on the following plants:
The above selection wasn't exactly what the original plan called for, but the easy availability at Home Depot meant that they won out.
Now, when do harvest?
Actually, I've got figure out a way to fence off these guys from the local rabbit and kid population. I'm thinking that my five minute fence that worked so well for the X-Garden may not work as well for these raised beds. The X-Garden is planted in a BigBagBed, which is round and tall enough that it supports the chicken wire poultry netting without addition posts. The rectangular beds look like they are going to need some sort of posts to give the netting shape. We'll see.
On the X side of things, we planted a bucket 'o mint:

Mint has a reputation for crowding everything else out, so it calls for it's own contained space to grow. This old beach bucket looked like the perfect container to recycle and the let mint run.
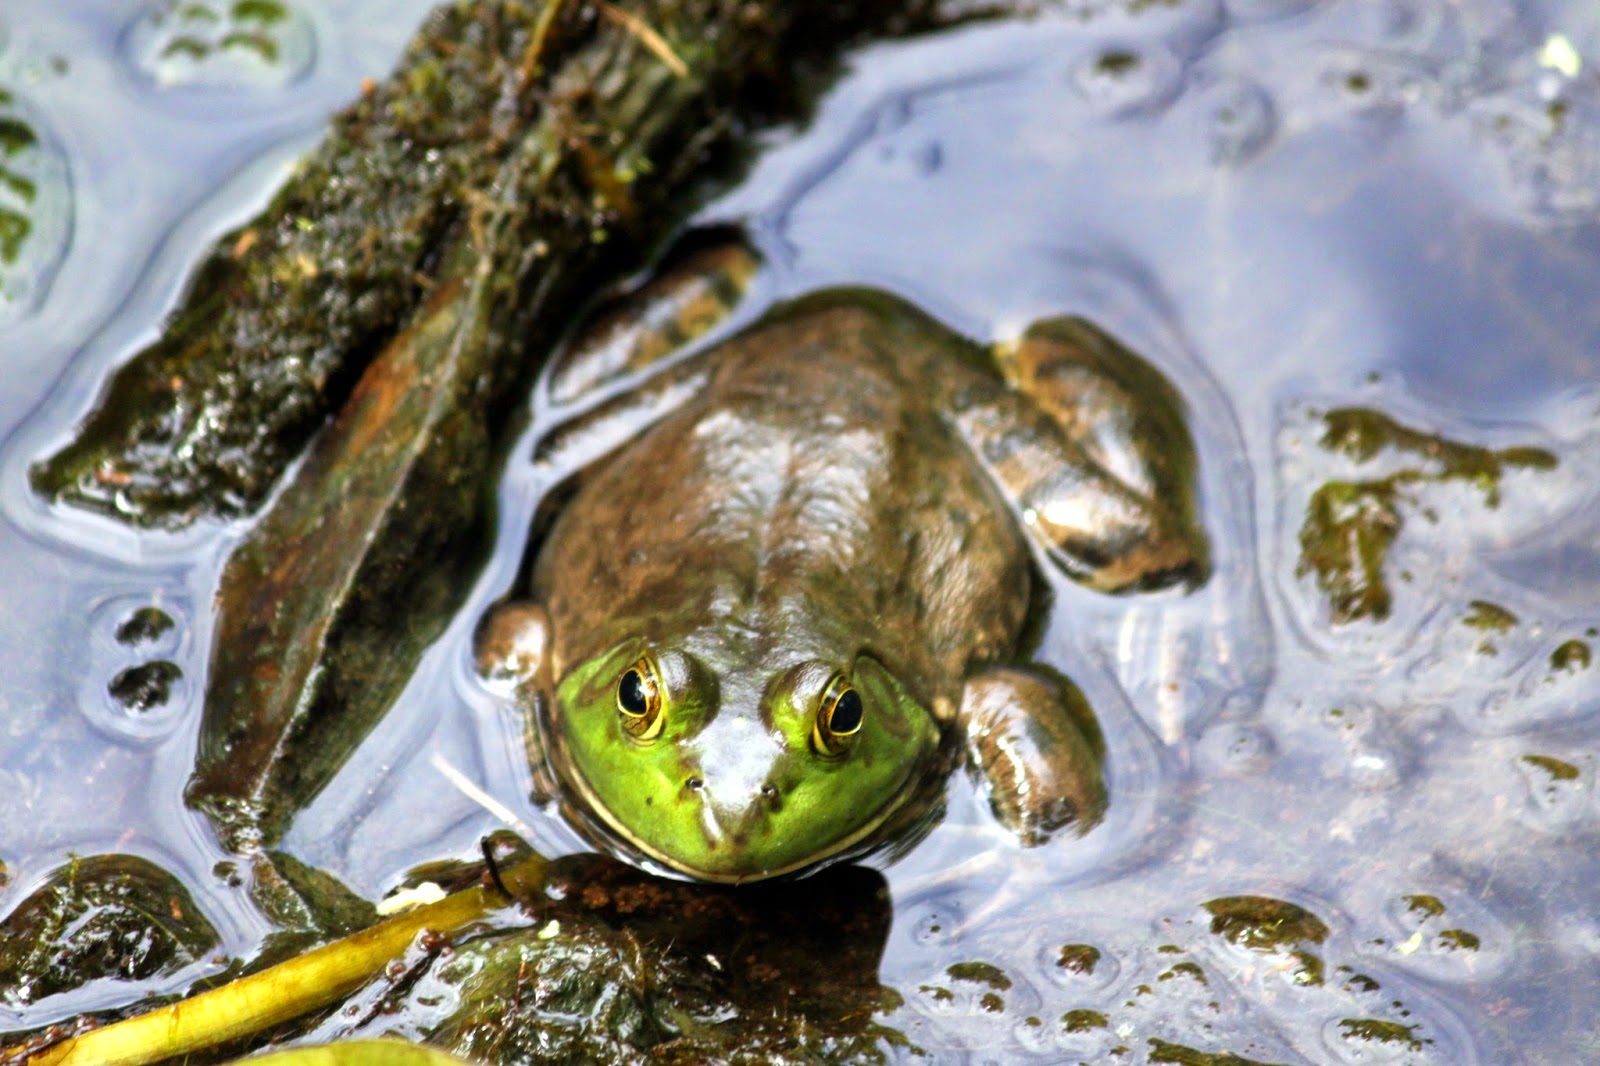
Last month I found Long Branch Nature Center, but yesterday was the first time I truly explored the grounds. As you approach the compact nature center itself there's a trail that loops around this pond:

The pond isn't especially large, but it's packed with life! Distinct orange fishies, tons of turtles and well camouflaged toads abound. See:

And checkout this (harmless) water snake that was warming itself:

As if that weren't enough, the pond has plenty of pretty flowers surrounding it:


Inside the nature center there are more small creatures to oggle (including hissing cockroaches and a skink!) and a play room for younger kids to kick back and enjoy.
For it's size, Long Branch Nature Center really is a wonder. And that pond, so cool!
Update: I also meant to include the photo below. It's of a bullfrog tadpole. I've seen itty bitty tad poles before, but compared to them, this guy is a giant. This photo was snapped inside the nature center.

To recap: I sprinkled some Earthly Choice Premium Quinoa grains in our X-Garden and wondered Will It Grow? The answer:

Why yes it does! Who knew?
Quinoa seeds are tiny, so 14oz of them is a huge amount. That makes the seeds both easy to find (check your grocery store, we got ours at Giant) and dirt cheap.
Time will tell if they actually grow into anything substantial. But they definitely germinated.

We just finished up a whirlwind visit to Boston. The trip started with us picking up Gavriella and heading to Halls Pond Sanctuary for a picnic lunch.
This tiny wildlife sanctuary is tucked in a block off Beacon St. What it lacks in size it more than makes up for in character. There's a small trail, boardwalk, pond, garden and most importantly, ducks and turtles. It was the perfect space for Gavriella to explore and served as the ideal picnic location.
Gavriella has the 3 R's going on: running, repeating and being really-cute. Whether we were on the trail, rocks, boardwalk or sidewalk, she wants to get down and run. We found that we only used the stroller because she was too fearless for her own good, not because she ever tired of walking. And be warned: once she hears a phrase once, she starts repeating it. Shira and I can have a healthy debate about which she says more often: "Uncle Ben" (or "Uncle") or "Aunt S-heera" (or "S-heeera").
After lunch we picked up the older kids and made our way to Hammond Pond and Webster Conservation Area. This is another incredible natural resource located essentially within city limits. Besides providing a wonderful trail around a pond, it has an abundance of interesting rock formations made up of "Pudding Rock." Yelp suggested that it was an ideal place to rock climb, and sure enough, we saw one climber practicing his skills on a 20~30ft face. The kids loved climbing on the rocks, and Dovid especially was absolutely fearless. His compact, tiny size totally works for him in that he can squeeze into spots I'd have to crawl around.
Tzipora was our little geologist. She kept packing her pockets with various special rocks. I finally had to convince her to stop and leave some rocks for the next set of park visitors.
Seriously, these Next Door Nature spots are absolute Bostonian gems and worth searching out if you're in the area.
On Shabbat, we found out just how far we can march the kids before even we feel like we overdid it. We made it almost 3 miles with almost no complaining. We visited one of our all time favorite spots: Chestnut Hill Reservoir (it's served as the first outdoor adventure for each of the kids). The reservoir didn't disappoint, providing oodles of turtles, a handful of ducks and one entertaining fisherman. I noticed for the first time that next to the reservoir is a Waterworks Museum--I'm so dragging the kids there next visit.
Another Shabbat highlight: the topic of allergies came up and I mentioned to the kids that Superman's only allergy was Kryptonite. Chana had to know more about this, and in no time had designed a tag-like game we could play.
Today we finished up with one last adventure: a trip to the water treatment plant! That's right, we hiked around Deer Island (a bit of a misnomer because there's neither deer there, nor is it technically an island) which serves as a massive water treatment plant for the entire area. The island is situated across from the airport and is part of the Boston Harbor. As a result, we got to watch planes, boats and oggle the massive structures that make up the plant.
Some resources suggest you can take a tour of the water treatment plant. As far as I can tell, the tour consists of what we did: hiking around the island and looking at various buildings and plaques. While it would have been interesting to get inside and get a real tour, doing the perimeter was perfect for the kids.
Truthfully, all of the sites on the island took a back seat to the real fun: standing on the shore and chucking rocks into the water. Seriously, that was the real highlight for the kids. I gave it a try, it's actually not that bad.
I leave Boston exhausted and content that we packed in all the fun we could in 3 days time. I could ask for nothing more.


Last weekend it became clear that if we were going to have gardens, we'd need some of protection from various varmints in the area. Here's my 5 minute solution:
Step 1. Order the supplies. I ended up picking up 36-Inch x 50-Foot 1-Inch Galvanized Mesh Hexagonal Poultry Netting, a 10 pack of 10.5-Inch long heavy duty stakes and 100 8-Inch zip ties. Oh, and I used the rubber mallet and basic pair of wire cutters I had lying around. (I can still hear my Dad: Every man should own a rubber mallet - how right you are Dad!)

Step 2. Measure out the length of chicken wire poultry netting. I wrapped a string around the X-Garden and then used that to measure out the length of netting I'd need. Cutting the chicken wire was easy enough.

Step 3. Wrap the chicken wire around the Big Bag Bed, secure the ends with a few zip ties and pound in a 4 or 5 stakes to hold it to the ground.

To my surprise, the setup actually seems solid. I checked out YouTube, and the majority of gardening fence builds there were quite elaborate, requiring measure, drilling and cementing. I've either managed to get lucky and find a clean design that's easy to build, or tomorrow I'll find the whole mess has collapsed.
OK bunnies (and neighborhood children), I'm ready for you - do your worst!
Looking at these tiny seedling I didn't want to do it. After all, these guys had grown from seeds, beating impossible odds to even exist. And yet, one has to thin them out. Failure to do so hurts all the plants. (At least this is what I'm told.)

So yeah, it pained me to snip some of these guys. But I knew I had to do it.
OK little guy, you've got the space all to yourself. Now grow!

I managed to pick up a Uniden UDWC23 camera to connect up with our current Uniden UDW10003 monitor. While I had the manuals for both devices in front of me, I couldn't manage to pair them. I was thinking I either had a bad camera or the devices weren't compatible. After spending an obscene amount of time on hold with Uniden I finally talked to a human. She walked me through the pairing process in 45 seconds.
The process isn't especially tricky, I just couldn't tease it out from the instruction manuals. Here's the process should find yourself in the situation.
1. Turn on both camera and monitor.
2. Hit the menu button, use the arrow down button take you to the Pair CAM section. Then use the right arrow to highlight the camera position you'd like to pair with.
3. This is where magic comes in. Press the button with the camera icon below it. (Obvious, right?)

If all goes well, you'll see this message:

4. Now hit the Link button on the camera.

And you're done. Happy Pairing!

